
For the past few days, I have been eager to make something using few rolls felt I bought from Daiso the other week, and when my eyes laid on my sewing machine, the answer was just right there - a new sewing machine cover!
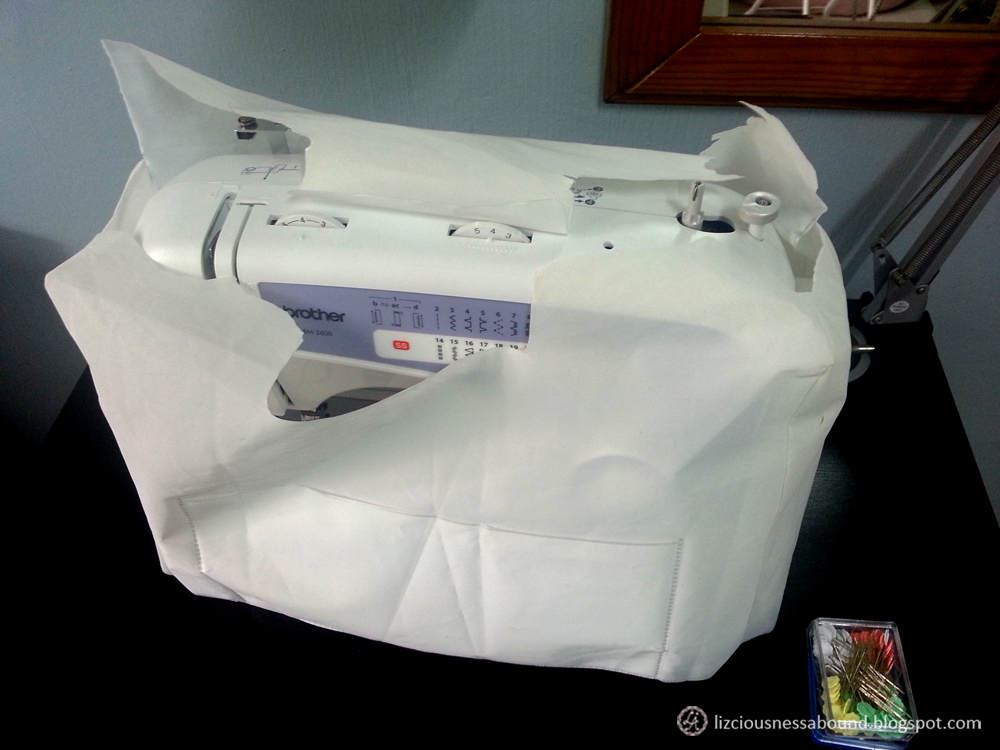
You see, the original cover (the one came with the machine) has torn itself up in so many places that it can no longer properly serve its original purpose - protect machine from the dust, etc:
 |
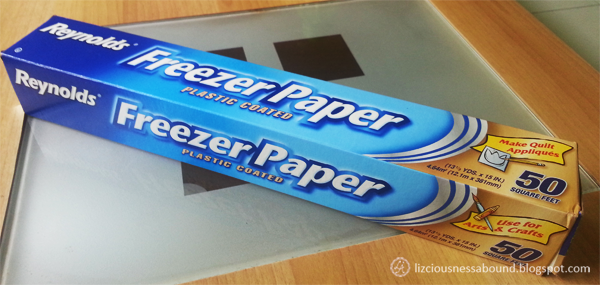
I also managed to find so many helpful tutorial on applique using freezer paper (just google with these keywords: applique freezer paper), I got myself a roll of freezer paper from Cold Storage. It sits neatly near the other rolls - aluminium foil, cling wrap, etc - and I gotta tell you... I totally LOVE freezer paper!
 |
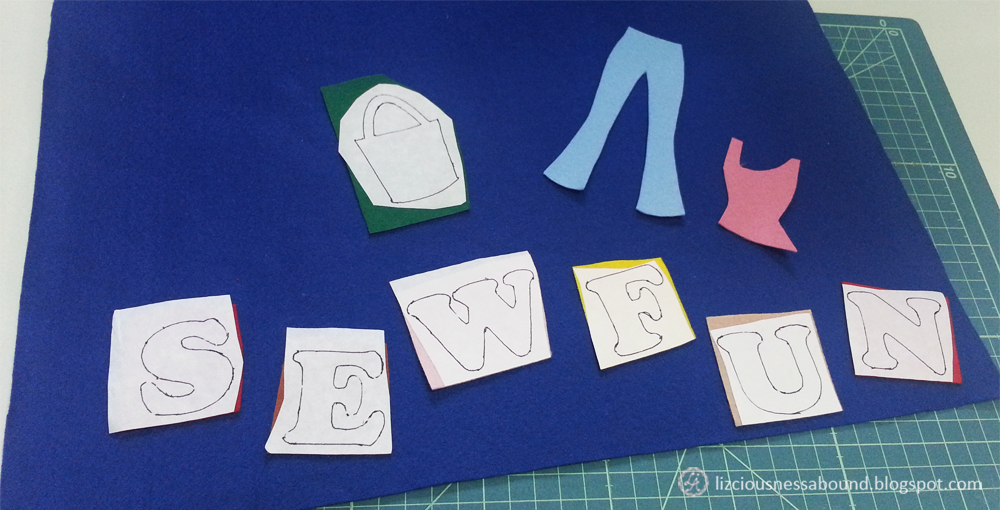
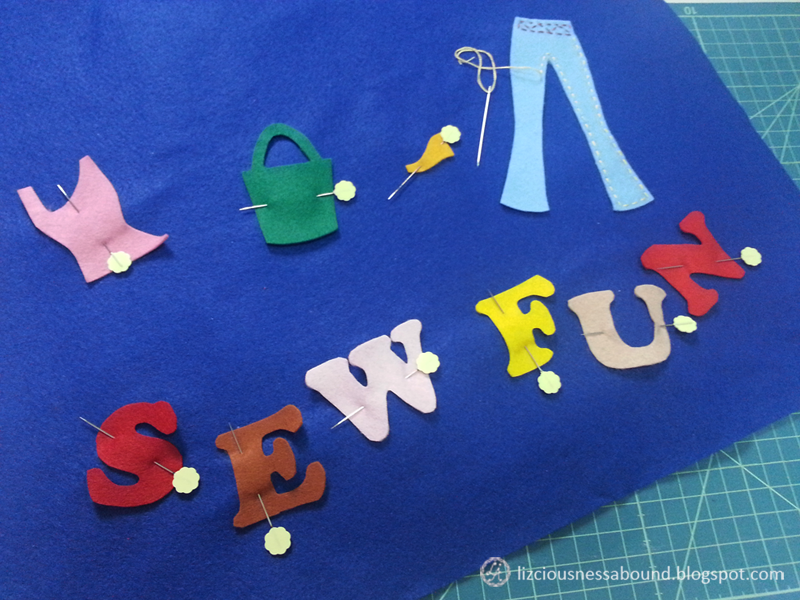
I started with designing and printing the applique templates that I want and traced them onto the paper (non-coated) side of freezer paper, and then ironed them onto the felt. This is what it looked like:
 |
The blue pants and pink blouse are the result after cutting them nicely and peeling off the freezer paper.
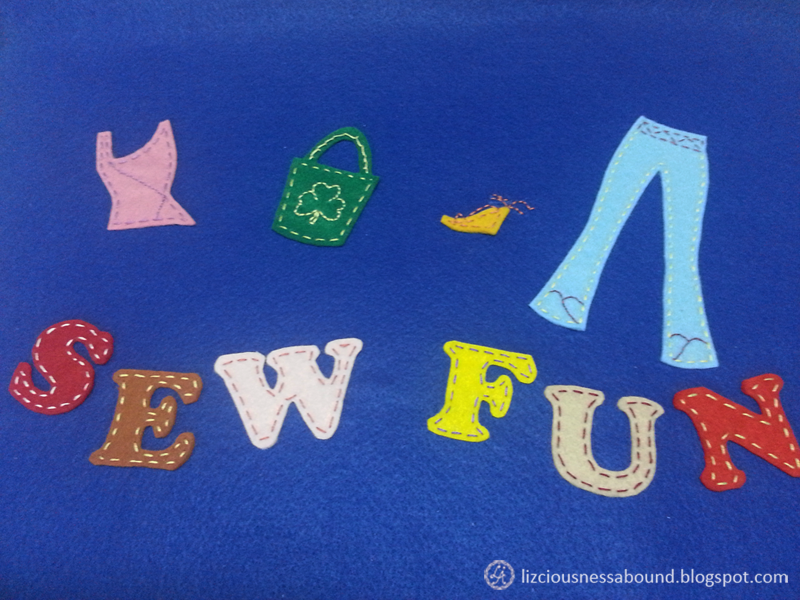
And then once all the cutting and peeling are done, we are ready to hand-stitch each of them:
 |
For my design, I used a simple running stitch and a little bit of chain stitch.
I also made bias binding from a Japanese fabric from my stash to add some more fun. :)
I sewed the bias binding for all bottom sides. I chose brown color for the left and right sides.
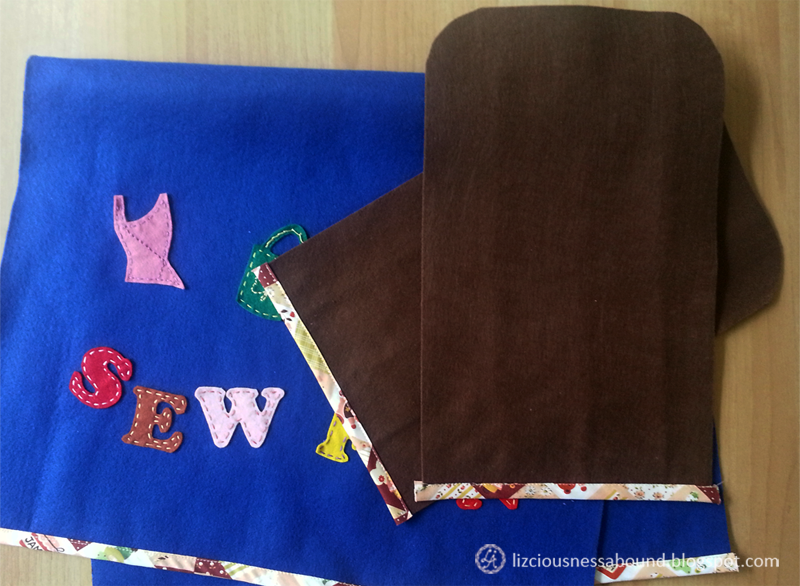
The last two steps would be assembling them, and add the bias binding.
Tip: clip the rounded edges of the brown felt in few v patterns (like this), and sew the edges slowly.
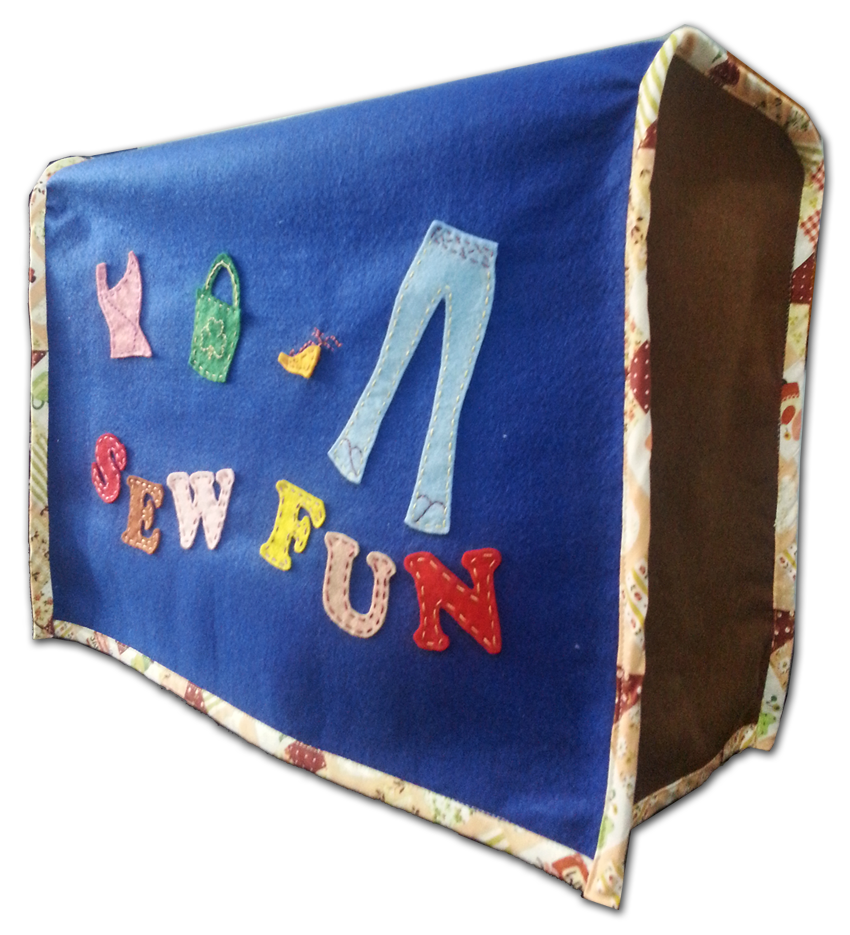
Here is the finished sewing machine cover:
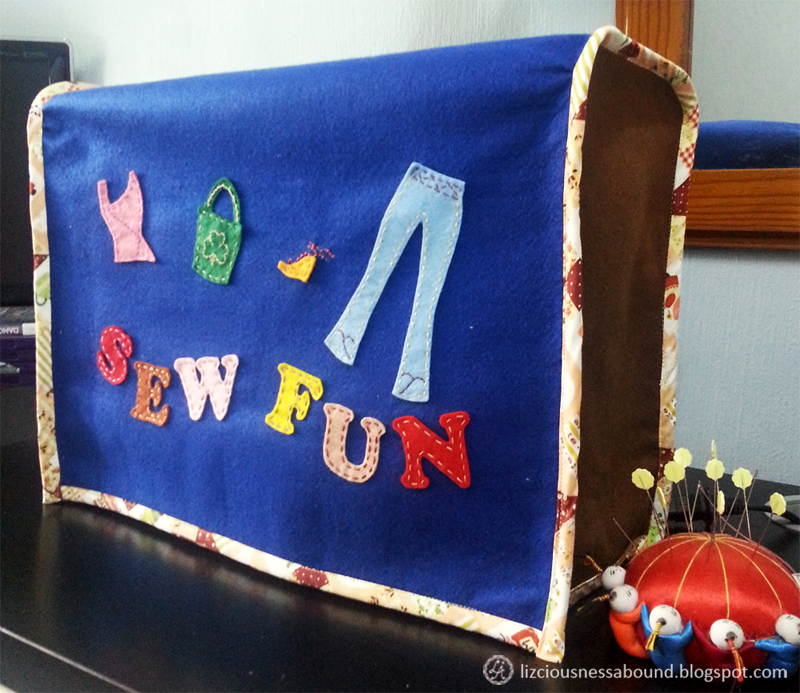
And now it serves two purposes: protect my sewing machine, and make my room prettier :)
Lastly, for everyone that celebrates St. Paddy's day:

No comments:
Post a Comment